Hello all,
I wanted to share with you my completed X-Carve Pro bench with cabinets and secured (and improved) control box)
The bench was made from a pair of off-the-shelf stackable shelving units. I did not build it (the bench) out of wood and instead went with shelving units because I wanted it to be modular and removable. I envision outgrowing this current shop, and wanted any future move to be as painless as possible,
Following the suggested 6’ x 6’ design recommendation from Inventables, and needing a top and bottom shelf, this required two four shelf break-down shelving units (I needed all of the side rails to be 6’ in length - PLUS a 6’ beam running down the center of each shelf - so that I could use 3’ x 6’ panels for the top and bottom shelves AND have it structurally reinforced).
I cut the four ‘legs’ to height (34"), and welded brackets to the ends of two of the ‘rails’ which run from front to back on both ‘shelves’ to allow then to connect to the frame at the front and back. There are 2"x2" strips screwed to all corners running the full height. This ads rigidity (the whole bench was racking as the machine was carving, these reinforcements completely eliminated that).
There is a 4" x 4" leg in the center at the bottom and another connecting the bottom and top shelves. I also made legs from the cut-off waste of the other legs, and they are placed mid span of the front and side rails (although I believe that these are just over-kill).
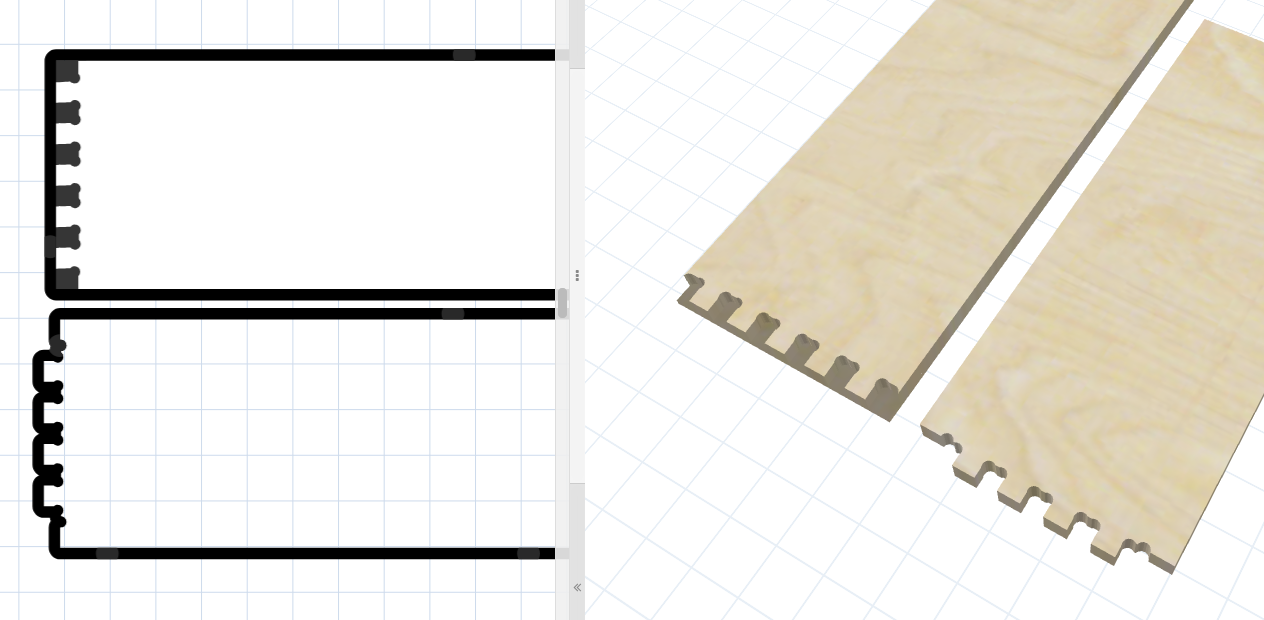
All of the cabinets were made using cabinetmaker in Easel, and you can see my multiple posts along the way with the limitations that I found with that software (many of which the good folks at Inventables have already rectified, others are on the build list, and others are head scratchers - like how does one make a dado all the way around a drawer to hold drawer bottoms when the front and back of a drawer box is carved from the BACK side of the material ??? - my solution was to grab my 100+ year old Stanley #50 and cut the dados like Grand-Pa used to). As with anything the learning curve on this build was a killer. I could have made these cabinets in less than half the time had I used the good ol’ tried-n-true cabinet building methods, but that would not have afforded me the opportunity to learn Easel and Cabinetmaker. So, no regrets.
I did not want to spend the $$$ for the expensive Blum self-closing drawer slides and figured that is decadence in a workshop. Instead, I used the inexpensive side-mount slides available from multiple sources online. This as you may know is not an option in cabinetmaker. This put my math skills to the test, as well as forcing me to learn all of the nuances of editing in Cabinetmaker to get the drawers right. Sometimes success, sometimes failure. But learning all the while.
It was an absolute necessity that I make these cabinets because, like many of you, my shop is small, and losing 6’ x 6’ of footprint meant that there would be no ‘home’ for many of the tools that I NEED to have in my shop. Now that the drawers are built, I am in the process of building out nesting for all of those tools within the drawers. Like this bench/cabinet build, it will have to be done in between a million other more important projects and will likely take nearly as long as this bench cabinets - which took nearly a year and a half (I’ll post more in the future).
Overall, I am very pleased with the cabinets. I have a love/hate relationship with the Cabinetmaker software, and see many areas where it still needs improvement, but I am a one-man-shop and will not be going into the cabinet making business, so my opinion in that arena likely doesn’t count for much.
Regardless, it is sure nice to be able to walk through the shop again, now that I have cabinets to hold my tools that were stuck in crates once the X-Carve Pro took over their home.
Attached are some photos. I welcome any questions.